Arm Lift & Thigh Lift
Arm Lift & Thigh Lift Gallery
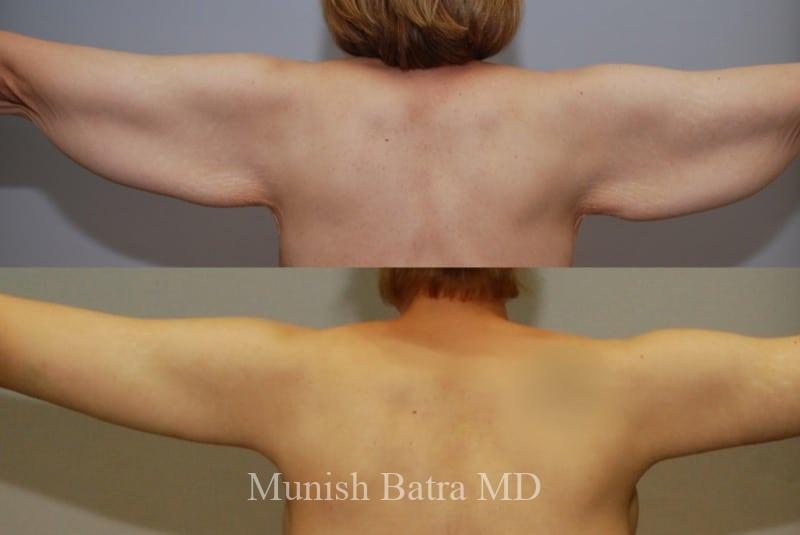
Back To GalleriesArm Lift Patient 11
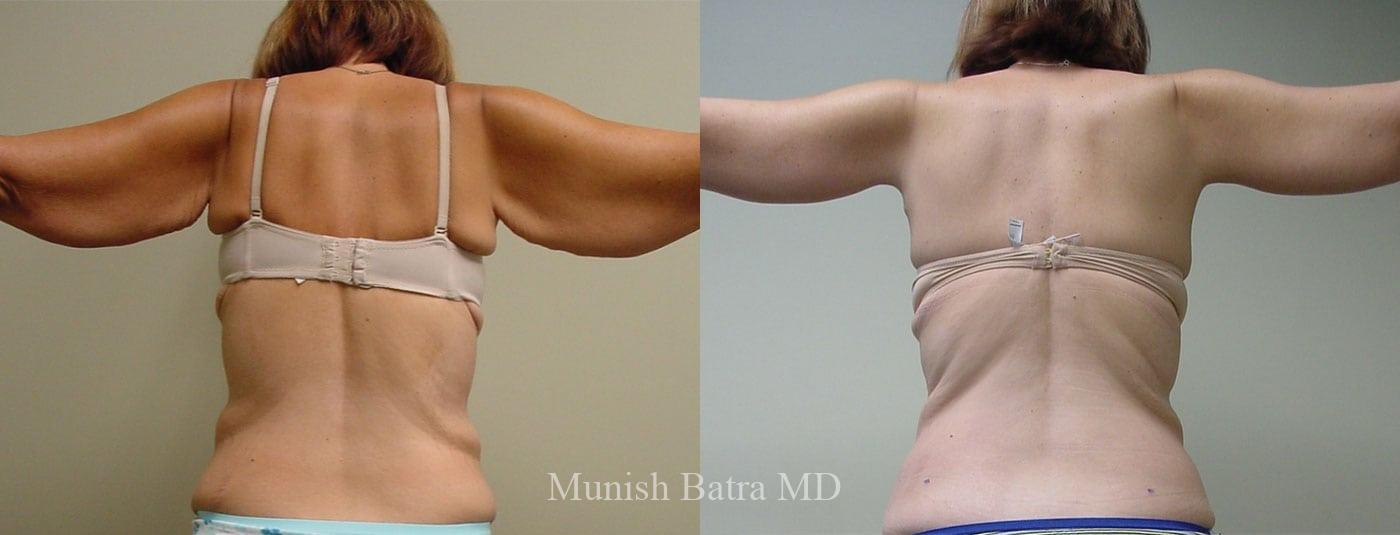
Arm Lift Patient 12
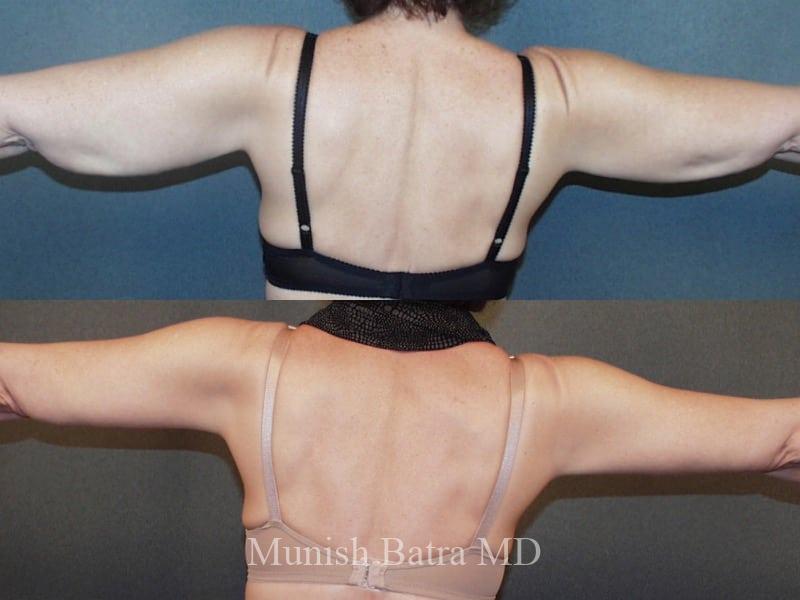
Arm Lift Patient 14
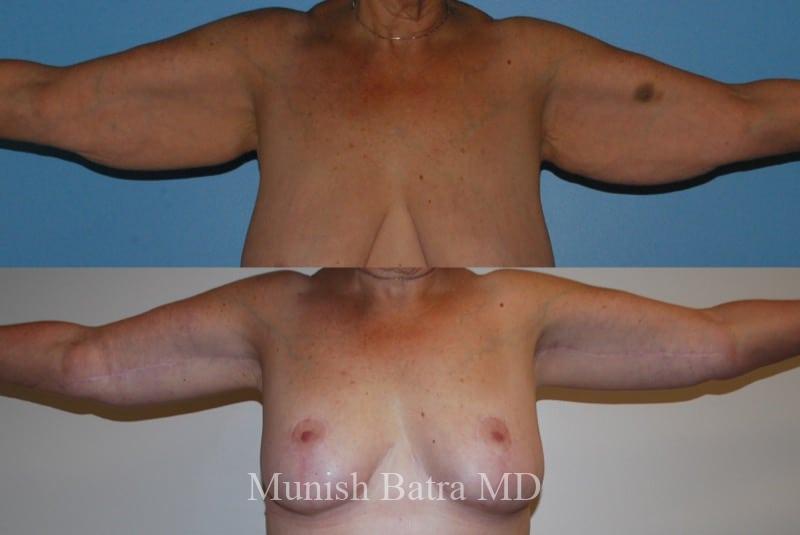
Arm Lift Patient 15
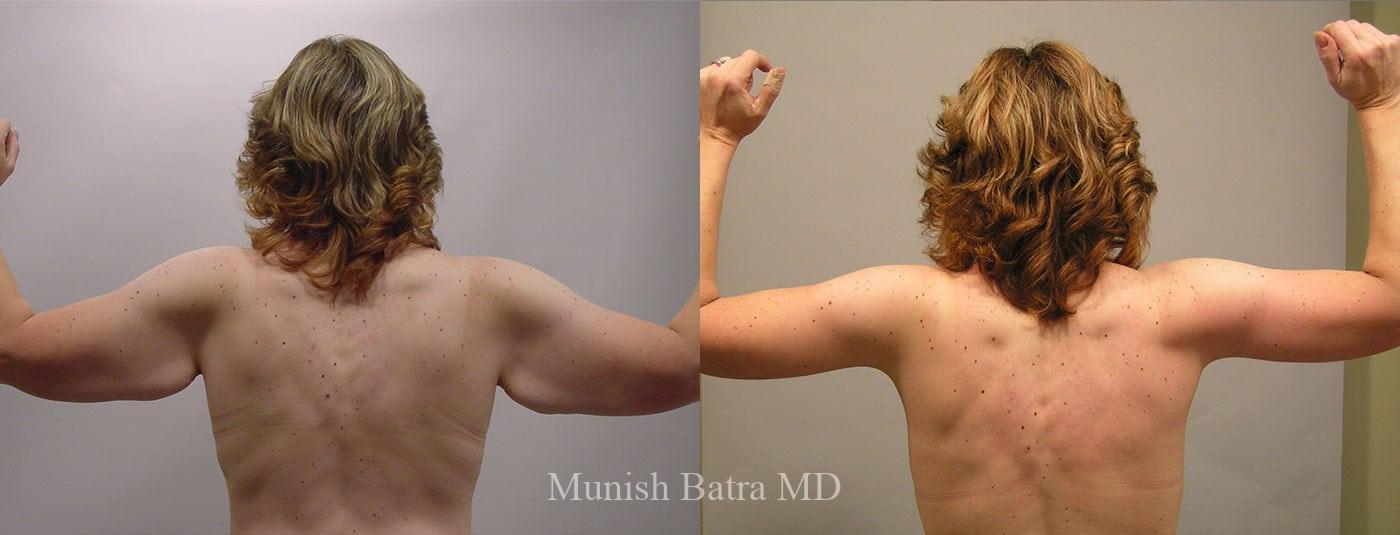
Arm Lift Patient 16
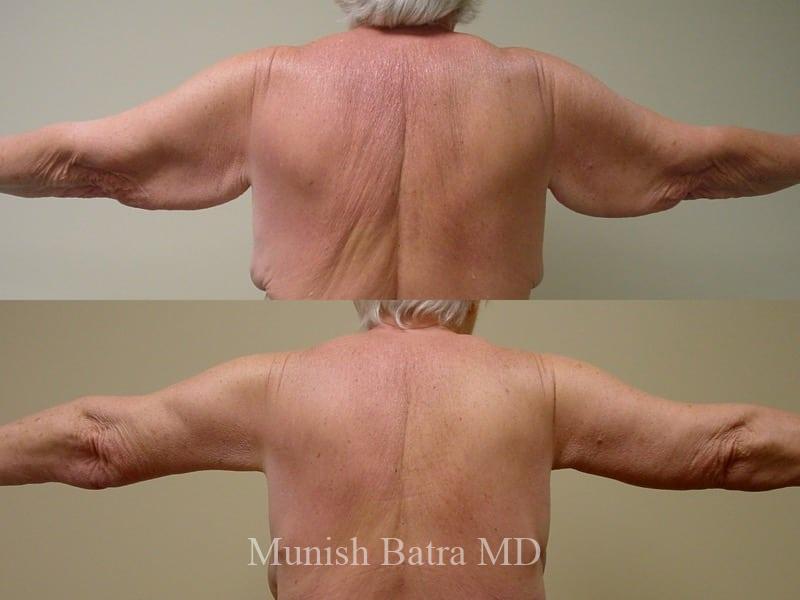
Arm Lift Patient 17
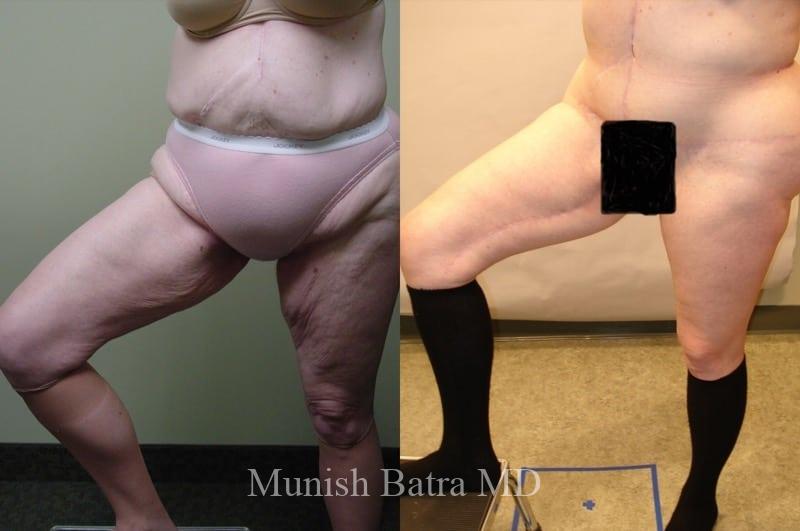
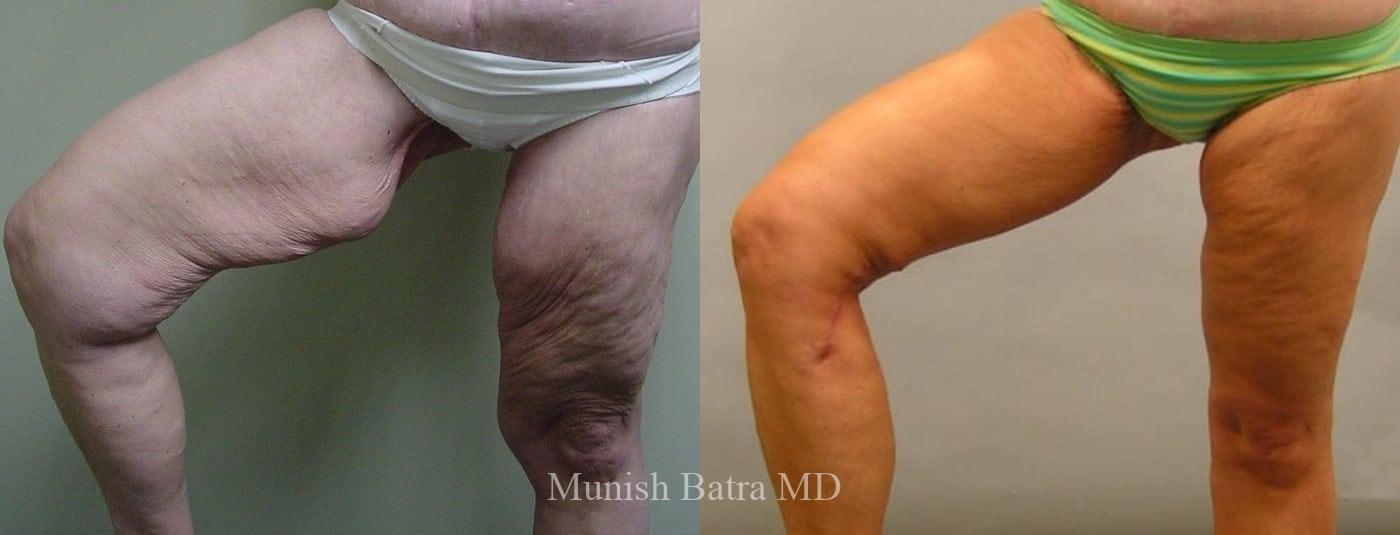
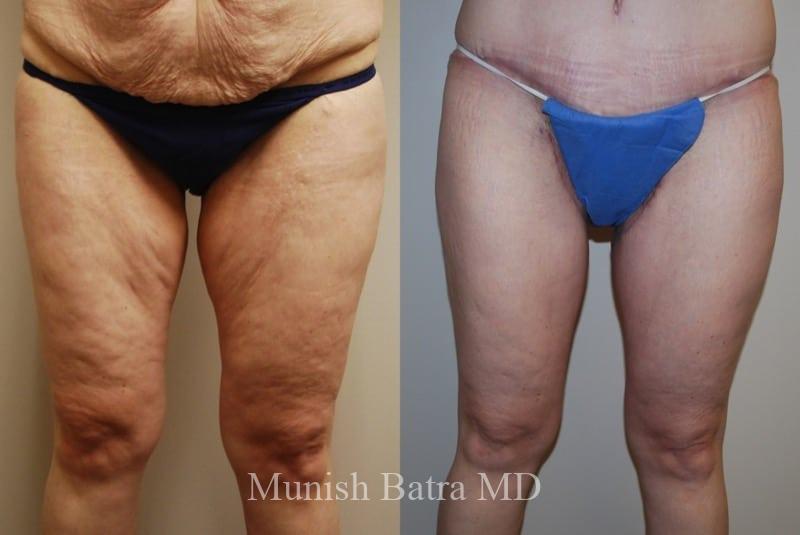
Thigh Lift Patient 1
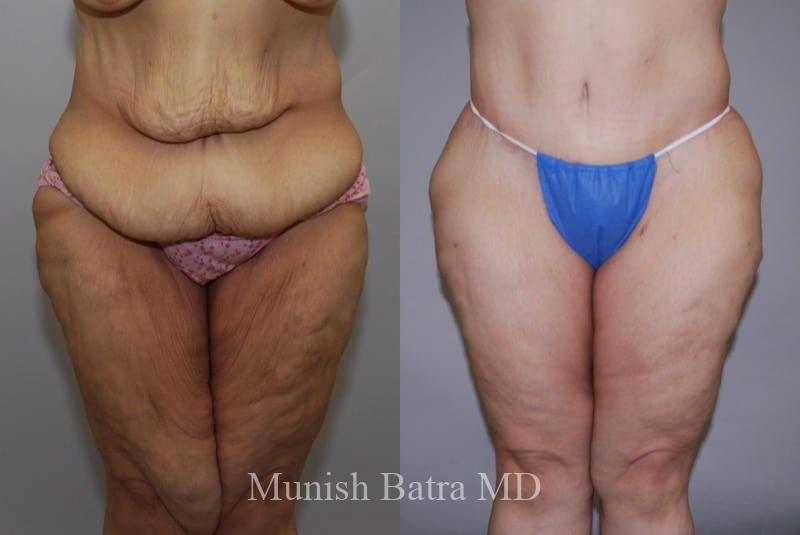
Thigh Lift Patient 2
Thigh Lift Patient 3
Thigh Lift Patient 4