Back Excision
Back Excision Gallery
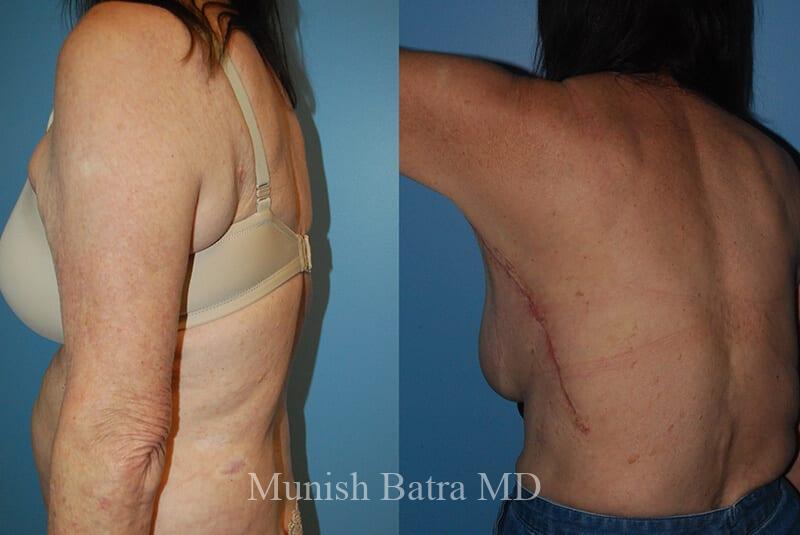
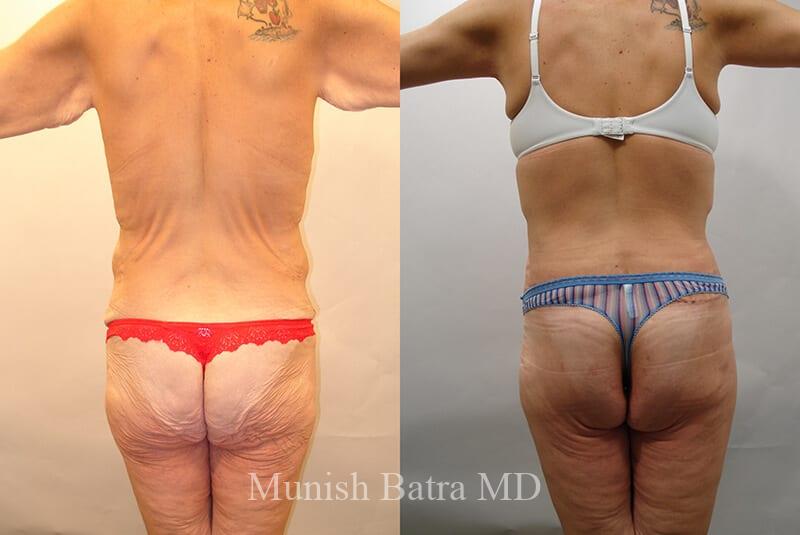
Back To GalleriesBack Excision Patient 1
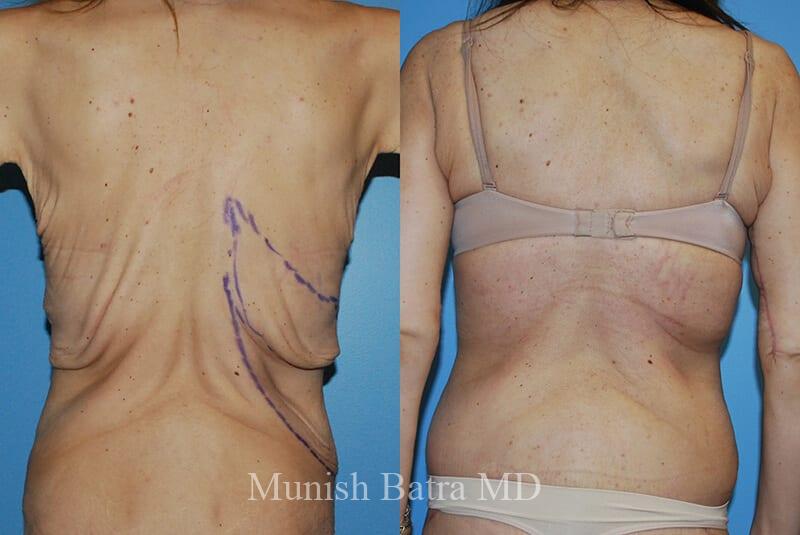
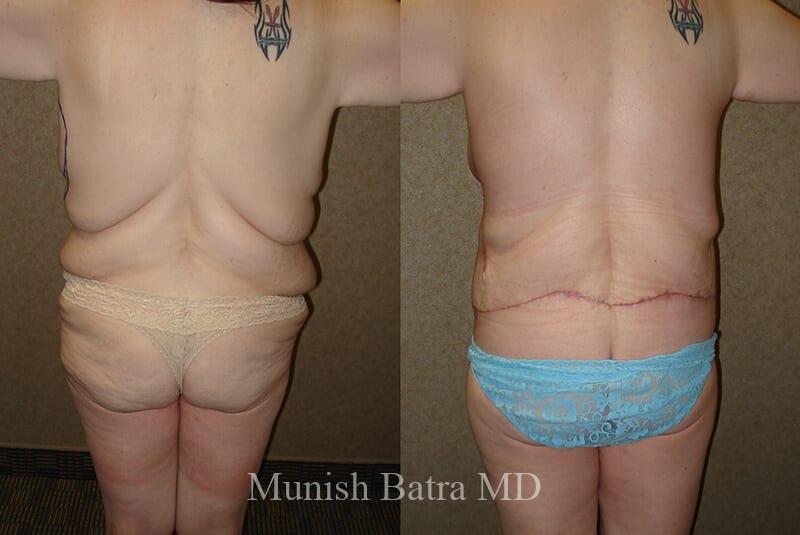
Back Excision Patient 2
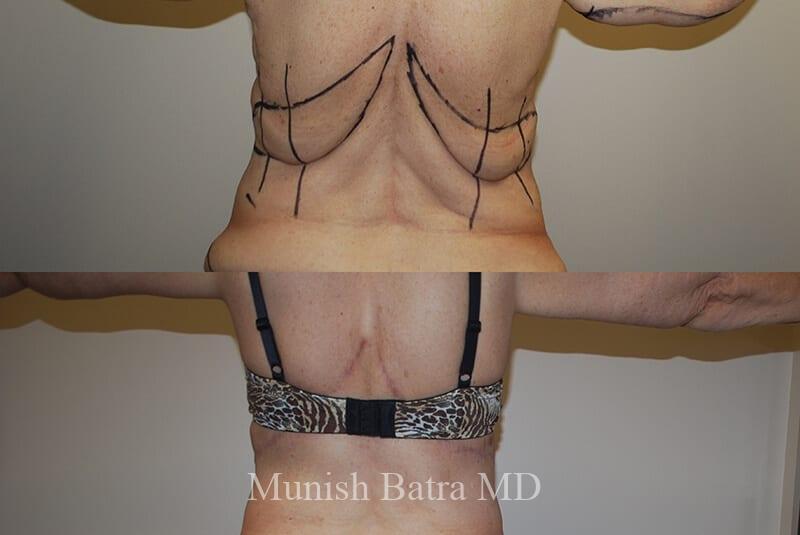
Back Excision Patient 3
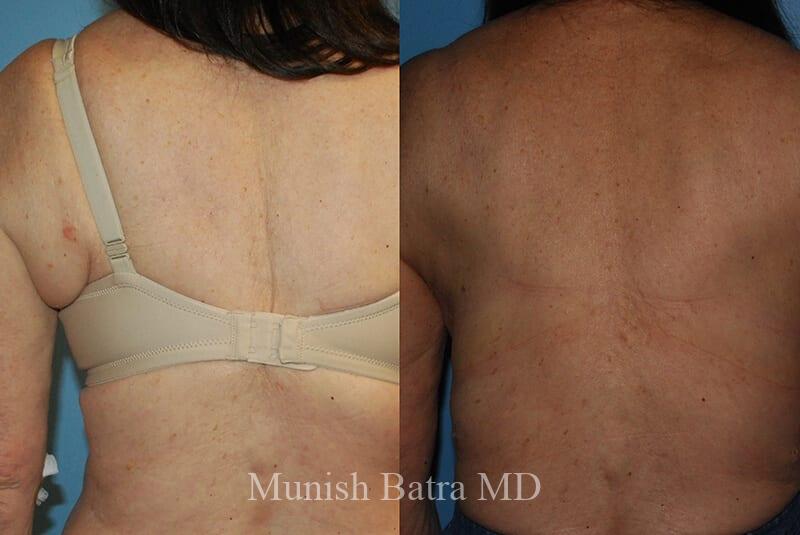
Back Excision Patient 4

Back Excision Patient 5

Back Excision Patient 6
Back Excision Patient 7
Back Excision Patient 8